Scroll down for English recipe and text!
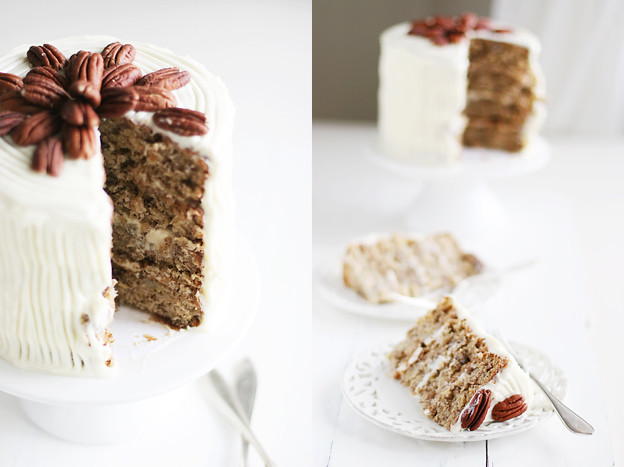
För inte så länge sedan köpte jag Hummingbird bakery's bok. Där finns många recept jag vill prova, men kände att jag nog var tvungen att börja med en Hummingbirdtårta! Jag gick dock inte efter receptet i boken, utan efter ett på Joy of baking, där det för övrigt finns otroligt många bra recept. Jag gjorde några små ändringar, och min bästa tårtassistent Emma tyckte att jag kunde fylla tårtan med mosad banan också. Tårtan var riktigt god, och den kommer säkert smaka ännu bättre imorrn!
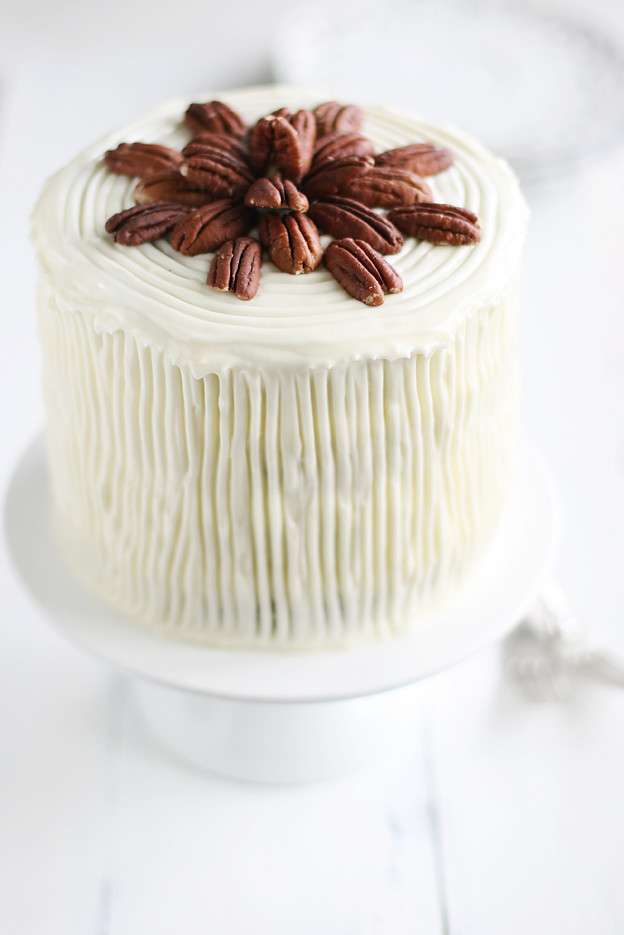
Hummingbird cake
Recept från Joy of baking
Räcker till fem 15 cm lager eller fyra 20 cm lager
•1 cup (110 gram) pekannötter, rostade
•3 cups (390 gram) mjöl
•2 cups (400 gram) socker
•1 tsk bikarbonat
•1/2-1 tsk kanel
•3 stora ägg, lätt uppvispade
•3/4 cup (180 ml) rapsolja
•1 1/2 tsk vaniljextrakt
•227 gram krossad ananas (häll inte ut vätskan)
•2 cups mosade bananer (3-4 st) + 1 extra för fyllning
Värm ugnen till 175 grader C. Smöra och mjöla runda bakformar.
Rosta pekannötterna i en ugnsfast form eller på bakplåtspapper i ugnen i cirka 8 minuter eller tills de är gyllenbruna. Låt svalna och hacka.
Blanda mjöl, socker, bikarbonat och kanel i en stor skål.
Vispa ägg, olja, vanilj, ananas, mosade bananer och pekannötter i en annan stor skål. Tillsätt de blöta ingredienserna till de torra och blanda samman allt. Dela smeten jämnt mellan formarna eller grädda i omgångar. Grädda cirka 25-30 minuter i mitten av ugnen. Låt svalna i formen cirka 10 minuter innan du stjälper upp kakan. Låt svalna helt innan du fyller tårtan.
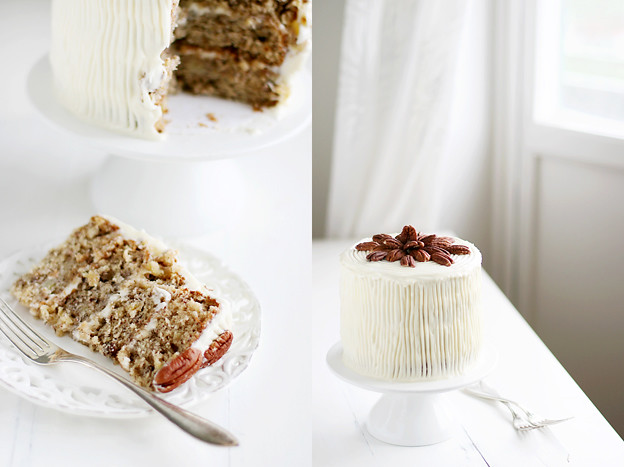
Cream cheese frosting
•80 gram mjukt smör
•300 gram cream cheese
•400-500 gram florsocker
•1 tesked vaniljextrakt
Vispa cream cheese och smör mjukt i en stor skål. Tillsätt florsocker och vanilj och vispa tills frostingen är jämn.
In English:
I bought Hummingbird bakery's book not so long ago. There are many recipes I would like to try, but I thought I should begin with the famous Hummingbird cake. I didn't follow the recipe in the book though, instead I used one from Joy of baking. I made a few changes, and my best assistant Emma suggested I should fill the cake with mashed bananas. It was so yummy, and it'll probably taste even better tomorrow!
Hummingbird cake
Recipe adapted from Joy of baking
Makes five 15 cm layers or four 20 cm layers
•1 cup (110 grams) pecans, toasted and finely chopped
•3 cups (390 grams) all-purpose flour
•2 cups (400 grams) granulated white sugar
•1 teaspoon baking soda
•1/2 teaspoon salt
•1/2-1 teaspoon ground cinnamon
•3 large eggs, lightly beaten
•3/4 cup (180 ml) safflower, corn, or canola oil
•1 1/2 teaspoons pure vanilla extract
•1 - 8 ounce (227 grams) can crushed pineapple, do not drain
•2 cups mashed ripe bananas (3-4 medium sized bananas) + 1 extra for filling (optional)
Preheat oven to 350 degrees F (180 degrees C) and place the rack in the center of the oven. Butter and flour round cake pans.
Place the pecans on a baking sheet and bake in the oven for about 8 minutes or until lightly browned and fragrant. Let cool and then chop finely.
In a large bowl whisk together the flour, sugar, baking soda, salt, and ground cinnamon.
In another large bowl, mix together the eggs, oil, vanilla extract, pineapple, mashed bananas, and finely chopped pecans. Add the wet ingredients to the flour mixture and stir until combined. Evenly divide the batter between the two prepared pans and bake for about 25 to 30 minutes or until a toothpick inserted in the center of the cake comes out clean.
Remove from oven and let cool on a wire rack. After about 10 minutes invert the cakes onto the wire rack, remove the pans and parchment paper, and then cool completely before frosting.
Cream cheese frosting
•80 grams butter, softened
•300 grams cream cheese
•400-500 grams powdered sugar
•1 teaspoon vanilla extract
In the bowl of your electric mixer (or with a hand mixer), beat the butter and cream cheese, on low speed, until very smooth with no lumps. Gradually add the powdered sugar and beat, on low speed, until fully incorporated and smooth. Scrape down the sides of the bowl as needed.
Sunday, May 29, 2011
Thursday, May 19, 2011
Banana cupcakes with caramel frosting!
Scroll down for English text and recipe!
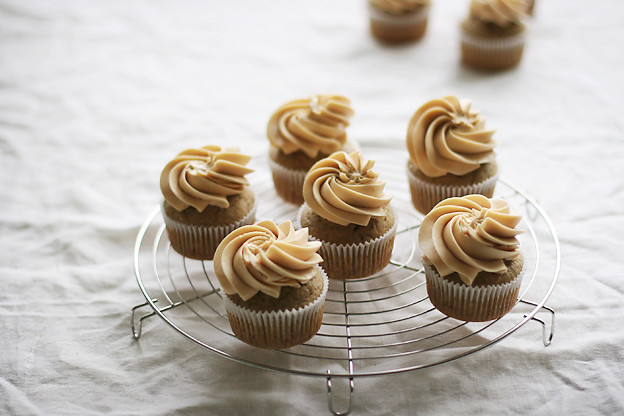
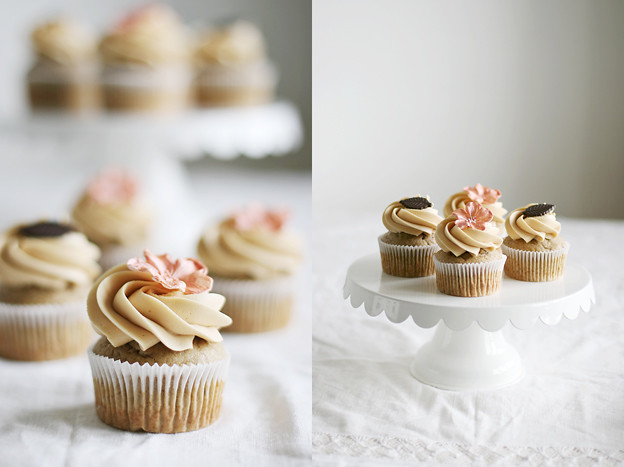
De här cupcakesen är så goda och så saftiga. Kan något som innehåller banan bli torrt överhuvudtaget? Jag tror inte det faktiskt. Jag uteslöt kanelen och pekannötterna ur receptet (idag får ni för övrigt hålla till godo med ett recept på Engelska, hoppas det är ok!) och de var ändå hur goda som helst, men lite pekannötter hade nog inte skadat.
Den här smörkrämen är faktiskt väldigt osmörig, om man kan säga så. Många recept på Swiss meringue buttercream innehåller faktiskt nästan den dubbla mängden smör. Nej usch, det blir alldeles för smörigt för min smak! Och jag vet att jag är lite luddig med mängd kola i receptet, men bara tillsätt och smaka av. Jag minns verkligen inte hur mycket jag hade i!
Caramel swiss meringue buttercream
•6 äggvitor
•240 gram socker
•270 gram smör
•Kola, efter smak
Gör såhär:
Häll äggvitor och socker i en värmetålig skål, ställ i vattenbad på spisen. Vattnet i kastrullen ska sjuda. Vispa hela tiden med en handvisp, tills blandningen blir cirka 65 grader. Ta genast bort från värmen. Vispa blandningen med elvisp eller med hjälp av en köksassistent tills blandningen är fluffig och vit, som en marängsmet. Vispa tills blandningen är sval, vilket kan ta upp till 10 minuter.
Tillsätt sedan smöret, en liten bit i taget. Oroa dig inte om smörkrämen skär sig! Det är lätt fixat. Är smörkrämen för kall, sätt skålen över vattenbad några sekunder och vispa igen. Är den för varm så sätt skålen i kylskåp och vispa sedan. Tillsätt kolan, efter smak och tycke, och vispa ett par minuter tills frostingen är slät.
In English:
These cupcakes are so moist and scrumptious. I don't think any recipe containing bananas can be dry, can they? I left out the cinnamon and nuts and they were still delicious, but I imagine some pecans would make them even better.
Yes, I know my buttercream is not very.. buttery. But I actually prefer to use as little butter as I can. And this recipe really works for me! I don't remember the amount of caramel I used so just add to your liking.
Banana cupcakes
Recipe adapted from Martha Stewart
Makes 28
Ingredients
•3 cups sifted cake flour (not self-rising)
•1 1/2 teaspoons baking soda
•3/4 teaspoon baking powder
•3/4 teaspoon salt
•1 teaspoon ground cinnamon
•1 1/2 sticks unsalted butter, softened
•1 1/2 cups packed light-brown sugar
•3 large eggs
•4 very ripe large bananas, mashed (about 2 cups)
•3/4 cup buttermilk
•1/2 teaspoon pure vanilla extract
•1 cup chopped pecans (optional)
Preheat oven to 350 degrees F (175 grader C). Line standard muffin tins with paper liners. Whisk dry ingredients in a large bowl. Mix banana, buttermilk and vanilla in another bowl. Cream butter and sugar with a mixer until light and fluffy. Add eggs, 1 at a time, beating after each addition.
Reduce speed to low. Add dry ingredients to butter mixture in 3 additions, alternating with wet ingredients and ending with dry. Scrape sides of bowl. Divide batter among muffin cups, filling each 2/3 full.
Bake cupcakes until testers inserted into centers come out clean, about 15-20 minutes. Let cool in tins on wire racks.
Caramel swiss meringue buttercream
•6 egg whites
•240 grams sugar
•270 grams butter, softened
Salted butter caramel, to your liking
Pour egg whites and sugar in a clean and heat proof bowl. Put the bowl in a double boiler, the water should be simmering. Whisk the sugar end eggs constantly so they don't curdle. The mixture should be about 65 degrees celsius, about 140-150 degrees F. If you don't have a thermometer, just rub some mixture between your fingers. If the sugar is melted, it is done. Remove from heat, whip until white, fluffy and cool. This step can take up to 10 minutes. Start adding the butter, very slowly. Don't worry if the mixture looks curdled and soupy, it's easy to fix! If the buttercream is too cold, just put the bowl in a double boiler again for a few seconds and whip again. If it's too hot, just put it in the fridge for a few minutes and whip. Add caramel to the buttercream and whip until smooth.
Thursday, May 12, 2011
Ruffle flowers!
Välkomna åter för nästa turtorial! Idag ska jag visa hur man tillverkar de enkla blommorna eller volangerna som är på min frilly cake. De fungerar utmärkt som nejlikor!
Welcome back! Today I'm going to show you how to make the simple flowers or ruffles from the frilly cake. These ruffles also work well as carnations!
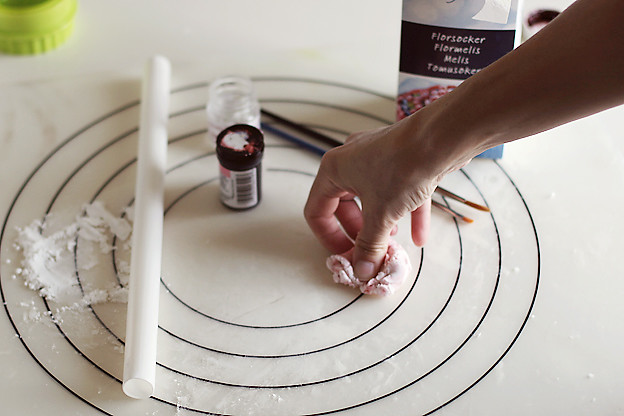
Här är ungefär vad vi kommer använda (minus ätbart lim). Både sugarpaste och flowerpaste fungerar bra. På tårtan använde jag flowerpaste, vilket jag nog föredrar framför sugarpaste. I den här guiden använder jag dock sugarpaste.
Here's what we'll need, except the edible glue. Both fondant and gum paste work well, but I prefer gum paste which is what I used on the actual cake. In this tutorial I'm using fondant.
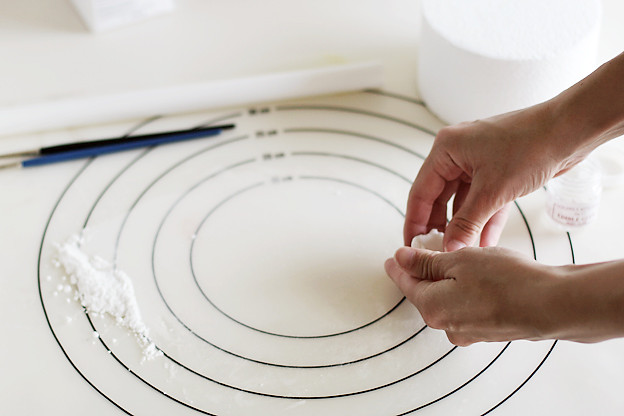
Knåda och färga sugarpasten.
Knead and color the fondant.
Kavla ut sugarpasten med en kavel.
Roll out with a rolling pin.
Använd en rund utstickare, vilken storlek som helst går bra. Ju mindre utstickare desto mindre blommor och ju större utstickare desto större blommor, och så vidare.
Use a round cutter of any size. A small cutter makes small flowers and a large cutter makes big flowers, and so on.
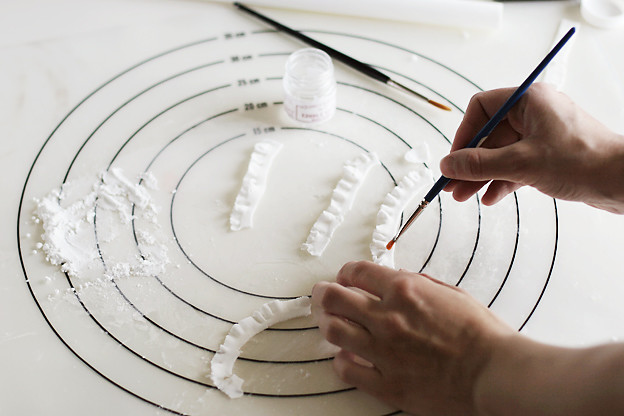
"Frilla" kanterna med skaftet på en pensel genom att försiktigt rulla den fram och tillbaka över sugarpasten. Gör detta runt om hela.
Frill the edges using the back of a brush. Gently roll it back and forth to create the frill effect. Do this all the way around.
Vik eller tryck ihop sugarpasten från mitten så att kanterna lägger sig lite hur som helst.
Press or "scrunch" the piece of fondant together from the middle to form a flower.
Wednesday, May 11, 2011
Frilly cake tutorial!
Eftersom så många har frågat hur jag har gjort tårtan i förra inlägget bestämde jag mig för att göra en liten tutorial. Min första faktiskt! Kom tillbaka i morgon för då visar jag hur man göra blommorna!
Since so many of you have asked for a frilly cake tutorial, I decided to make one. My first actually! Come back tomorrow to learn how to create the flowers!
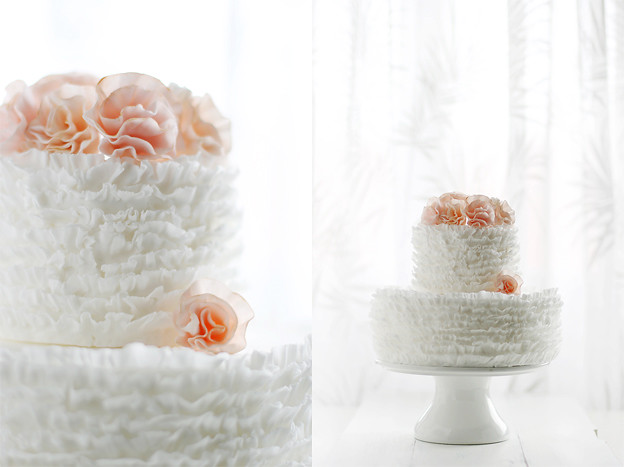
Här är alltså tårtan vi ska (åter)skapa!
This is the cake we're going to (re)create!
Här är ungefär vad vi behöver. Inget överdrivet avancerat, eller hur? Ofta duger det bra med enkla verktyg. Man får använda fantasin och ta vad man har helt enkelt! Har man inte ätbart lim går det också bra med kristyr eller lite (obs! lite) vatten. Något som nästan är viktigare än verktygen är tålamod. Detta kommer ta en stund. Notera också att det kan vara en fördel att använda en riktig tårta (täckt med sugarpaste eller marsipan är nog att föredra). Jag använder en dummy bara för att visa metoden.
Tools:
Fondant/sugarpaste
Rolling pin
Powdered sugar
Edible glue
Brushes
and finally, a cake (covered with fondant or marsipan)!
Here's what you'll need. Nothing too fancy right? With a little imagination you don't need any fancy tools. If you don't have edible glue, royal icing or a little water will also do the trick. What is even more important is patience. You'll need it for this one. This is going to take a while. Note that I'm using a dummy cake just to show you the method.
Börja med att knåda sugarpasten. Börja med en liten bit så att den inte hinner torka ut.
Start by kneading the fondant. Start off with a little piece so it doesn't dry out.
Rulla ut sugarpasten.
Roll out the fondant.
Gör "korven" smal om du vill ha små volanger och stor om du vill ha stora volanger. Ja, ni förstår. Ju mindre volanger desto mer jobb. Jag gör små volanger denna gången.
Make it thin if you want small frills and not so thin if you want bigger frills. You get the point. The smaller frills the more work. I'm making small frills this time.
Använd kaveln för att platta ut "korven". Jag tycker att det är lättare att skära mindre bitar av remsan och frilla dem istället för att göra det med hela.
Use the rolling pin to flatten the fondant "sausage". I think it's easier to cut smaller pieces to frill than to frill the whole thing.
Använd skaftet på en pensel för att "frilla" kanten på sugarpasten. Tryck försiktigt och rulla skaftet fram och tillbaka över sugarpasten för att få fram effekten. Pudra gärna underlaget med florsocker så att sugarpasten inte fastnar. Det är väldigt lätt hänt att den går sönder, men det gör inte så mycket!
Use the back of a brush to create the frill effect. Gently press the back of the brush against the fondant and roll it back and forth. Use some powdered sugar underneath to make sure it doesn't stick. If it tears a little, that's ok! No one will be able to tell.
Pensla på lite ätbart lim på alla bitar, på sidan som ska fästas på tårtan.
Brush some edible glue on all pieces, on the side we're going to stick to the cake.
Sätt försiktigt på den första remsan på tårtan. Volangerna ska sticka upp lite ovanför toppen på tårtan.
Carefully put the first piece on the cake. Put it right on the edge of so the frills are a little bit taller that the top of the cake.
Fortsätt hela vägen runt.
Keep on going all the way around to complete the first layer of frills.
Fortsätt sedan på nästa varv och upprepa till tårtan är helt täckt med volanger. Jag täckte inte hela tårtan eftersom jag helt enkelt precis har gjort en. Jag hoppas ni förstår ändå!
When you're done with the first layer, begin the second layer and then keep going until the whole cake is filled with frills. I didn't complete the whole cake because well.. I already made one! I hope you get the point anyway!
Thursday, May 5, 2011
Frilly cake!
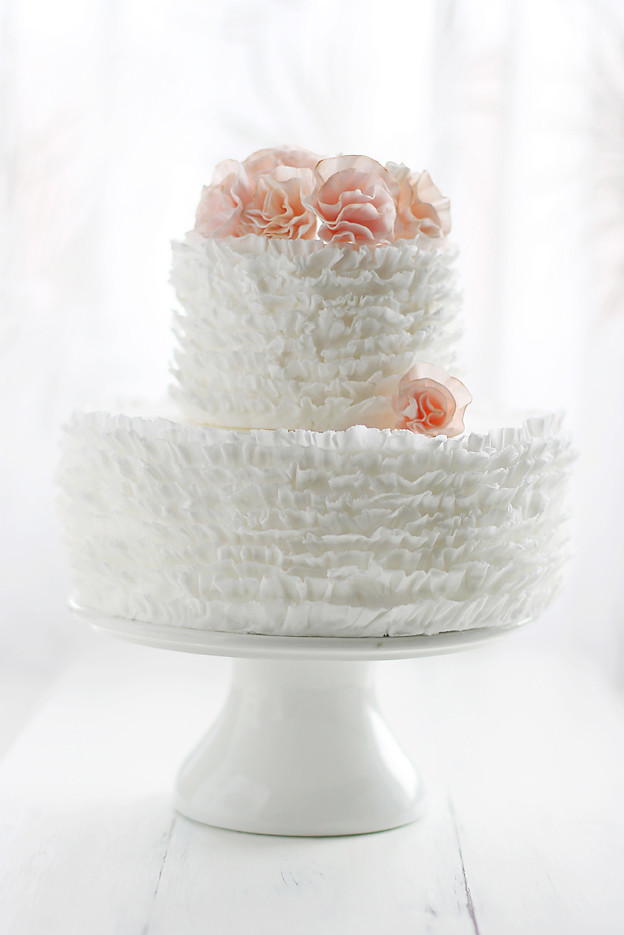
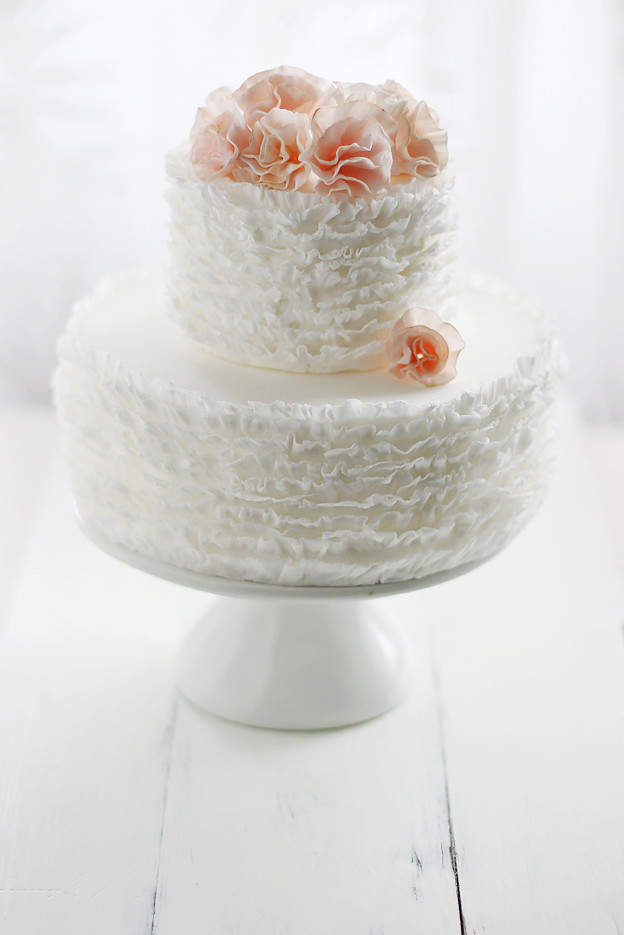
Ni kanske har märkt att jag tycker om spets, volanger, vitt och rosa. Den här tårtan innehåller nästan allt jag tycker om. Nästan. Det fattas ju spets! Men var skulle den få plats? Det går ju liksom inte. Först skulle detta bara vara en liten testtårta, men det råkade bli så mycket mer. Jag blev iallafall väldigt nöjd med den!
Tårtdesignen är inspirerad av fantastiskt duktiga Maggie Austin.
Maybe you've noticed my affection for lace, ruffles, frills, white and pink (ahem.. wedding cake). This cake is almost the epitome of everything I like. Almost. There is no lace though, but where would I put lace? There is no room for it! This was supposed to be a small practice cake, but it turned out to be so much more. Anyhow, I'm very pleased with it!
The cake design is inspired by the talented Maggie Austin
Sunday, May 1, 2011
Chocolate liquorice cake and raspberry ice cream!
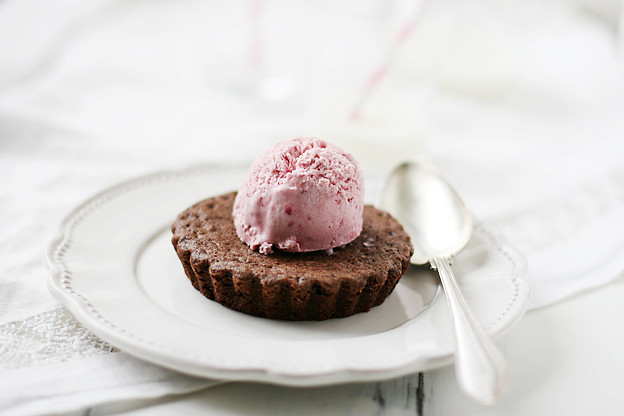
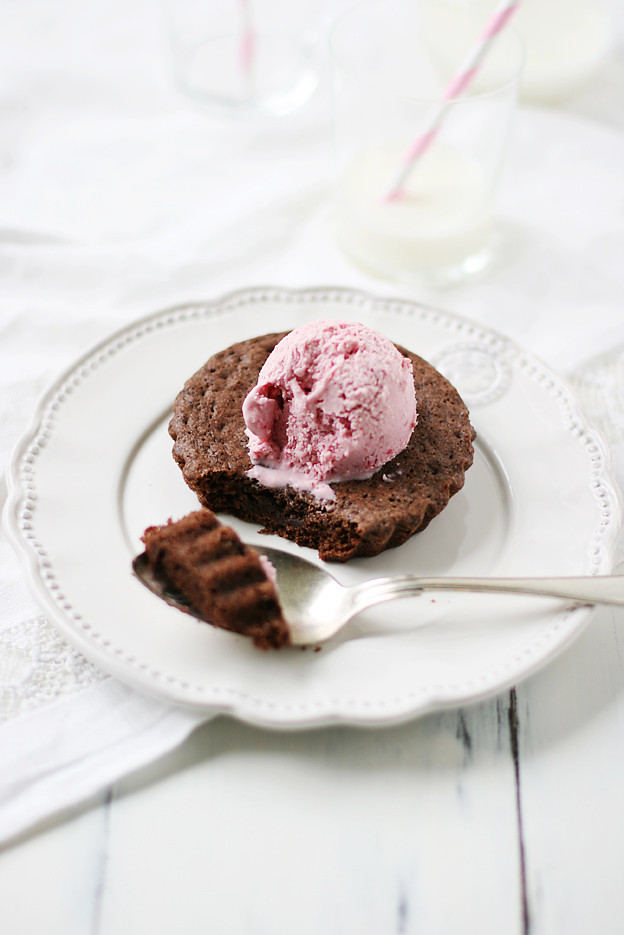
Jag köpte lakritspulver häromdagen för ett alldeles speciellt bakprojekt som jag hoppas kunna dela med mig av snart. Tills dess kände jag att jag ville experimentera lite eftersom jag aldrig någonsin har bakat med lakrits. Man har ju hört att det ska passa bra till choklad, så jag kände att det var ett säkert kort. Hallon blev det bara för att jag tänkte på sånt där godis ni vet, döskallar som är hälften hallon (om man nu kan kalla det hallon..) och hälften lakrits. Inte för att jag äter sådana, men av någon anledning kom jag att tänka på dem. Hursomhelst blev detta en väldigt lyckad kombination, men tycker man inte om lakrits går det självklart lika bra att utesluta det ut receptet.
Tryck för större bilder!
Scroll down for recipe in English!
In English:
I bought liquorice powder the other day for a very special project that I hope to share with you soon. Until then I wanted to experiment a bit with liquorice, since I have never ever used it in baking before. I've heard that chocolate and liquorice is a match made in heaven, so that was a safe bet. For some reason I also thought of those candy skulls which are half liquorice and half raspberry (well, I don't know if I would call that raspberry..). I never eat them but for some reason I thought of them. Anyway, it was a perfect match, but if you for some reason don't like liquorice you can always exclude it from the recipe. Raspberries and chocolate make a pretty darn good match too.
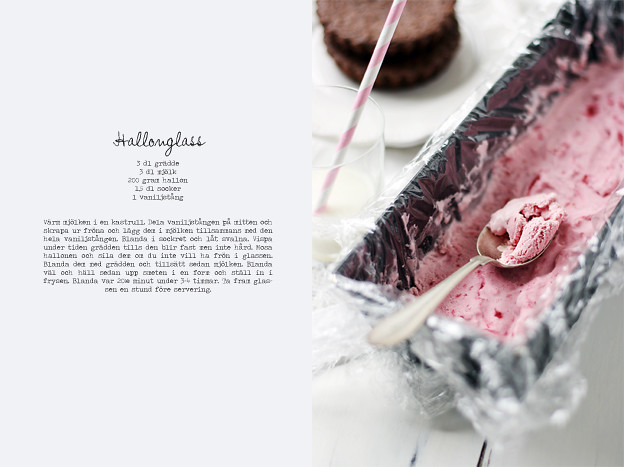
Raspberry ice cream
•3 dl heavy cream
•3 dl milk
•200 grams raspberries
•1,5 dl sugar
•1 vanilla bean
Heat the milk in a saucepan. Split the vanilla bean and scrape out the seeds and put them and the whole bean in the milk. Stir in the sugar until it dissolves and then let cool. Whip the cream in another bowl until soft peaks form. Mash the raspberries and push them through a strainer to get rid of seeds. Mix them with the cream and then add the milk. Mix well and pour into a pan or a bowl. Put the pan in the freezer. Mix every 20 minutes for 3-4 hours. Remove from freezer a while before serving.
Chocolate liquorice cake
•100 grams melted butter
•2 eggs
•2,5 dl sugar
•1,5 dl flour
•4 tbsp cocoa powder
•1-2 tsp liquorice powder
•2 tsp vanilla sugar
•1 pinch of baking powder
Mix the butter, sugar and eggs. Mix flour, cocoa powder, baking powder and liquorice powder in another bowl and then add it to the butter mixture. Pour batter into a pan (or several small ones). Bake for about 16-18 minutes in 175 degrees C.
Subscribe to:
Posts (Atom)